Build Your Own PIcture Frame
Overview
In my post Not Every Idea Was a Winner, I said that the Raspberry Pi Zero 2 W was not powerful enough to render images in a digital photo display project. That being said, I hate having hardware sitting around not doing anything - specifically the Pimeroni 4” Hyperpixel display that I bought specifically for this idea. I had a Raspberry Pi 5 - 8 GB that was between projects so I figured I would revisit the picture frame idea. Technically-speaking, this is pretty low hanging fruit for the Pi 5 and absolutely overkill. I only set mine up as a proof-of-concept but I’ll be damned if it didn’t add the final missing touch to my homelab that I even didn’t know it needed.
The alternative to building your own is to purchase an off-the-shelf digital picture frame. You typically insert an SD card filled with pictures, plug it in and it just works - no fuss. Some fancier frames add some kind of service for bonus features like adding pictures via text or email, or automatic syncing via smart phone app. Is this easier? Yes. Does it require personal data to sign up? Yes. Is it secure? Not always. Can you repurpose as something else? Highly doubtful. Is it open? No. So, it’s for all the typical reasons that I think it’s just better to host your own. Plus it’s more fun. Fight me about it.
Hardware
You don’t need a lot for this project, the bare minimum is a computer of some kind attached to a screen of some kind. The computer needs to be at least better than a Raspberry Pi Zero 2 W, as discussed in the previous post. I would still go with an SBC for the best price/power usage/multi-function value. The Pi 5 is overkill but I got to the SBC game a little late and I’ve never tested anything earlier than that. In fact, just today Raspberry Pi released a 1 GB Pi 5 which sounds right-sized for this project. Just keep in mind that 1 GB of memory is NOT a lot if you want to use the Pi as an actual desktop PC.
If you want to use the Hyperpixel display, you will need a device with GPIO pins. The instructions in this post are for a Raspberry Pi 5 running Raspberry Pi Trixie Desktop OS with the Hyperpixel display. The desktop OS is required for the picture frame app.
Setup
As always, the first step is to update the system:
1
sudo apt update && sudo apt full-upgrade -y
If you have a Hyperpixel display, open the Pi 5 config file with sudo nano /boot/firmware/config.txt, then add this to the bottom, save, and exit…
1
dtoverlay=vc4-kms-dpi-hyperpixel4
…then reboot:
1
sudo reboot
The slideshow app I used is feh, so install that too:
1
sudo apt install feh -y
The simplest way to run a new slideshow is to execute it on the command line like so:
1
feh --fullscreen --slideshow-delay [seconds] --randomize --hide-pointer [path to photos]/*
If you already have pictures saved locally or on a USB storage device that’s already plugged in and mounted, just specify the path in the command and you’re finished.
Add Pictures
If you don’t already have pictures saved locally, you can power off the Pi and mount its storage disk to another computer and copy pictures to it. This is pretty simple if you use an SD card for storage, but not so simple if you have an NVMe HAT connected, and the whole thing is inside of a case, and you don’t have an NVMe to USB adapter. If that’s too much work, you can also use one of these two remote options:
Host an SMB Share on the Pi
With this method, you can add pictures directly to the Pi by hosting a network share from it. If you do this, you need to make sure the Pi has enough available storage for all your pictures.
- Depending on your version of Raspberry Pi OS, you may need to install samba server:
1
sudo apt install samba samba-common-bin -y
- Create a folder to share out:
1
mkdir ~/share/pictureFrame -p
- Set the folder permissions:
1
sudo chmod 777 ~/share/pictureFrame - Edit the samba config file:
1
sudo nano /etc/samba/smb.conf - Add this block to the bottom, update the username in the path, then save and exit:
1
2
3
4
5
6
7
8
[pictureFrame]
  path = /home/[username]/share/pictureFrame
  read only = no
  browsable = yes
  writable = yes
  create mask = 0777
  directory mask 0777
  force user = smb
- Restart the samba service after changes to the config:
1
sudo service smbd restart - Create an SMB user:
1
2
sudo useradd smb # enter password, then again to confirm, then press Enter through the prompts
sudo smbpasswd -a smb # enter the same password for simplicity, then again to confirm
- Open file explorer from another device and connect to
smb://[Pi IP]/pictureFrame(or\\[Pi IP]\pictureFramefrom Windows) and enter the smb user credentials you specified in the last step. You should now be able to copy pictures here from any device on your network. - Run slideshow from the Pi:
1
feh --fullscreen --slideshow-delay [seconds] --randomize --hide-pointer ~/share/pictureFrame/*
Connect the Pi to an Existing SMB Share
Using this method, the slideshow can use pictures stored on an existing samba share on the same network.
- On the Pi, create a local directory to mount the samba share:
1
sudo mkdir /mnt/fileShare - Install cifs-utils if necessary:
1
sudo apt install cifs-utils -y
- Create a local samba credentials file:
1
nano ~/.smb
- Add this, save, and exit:
1
2
user=[samba share user]
password=[samba share password]
- Test the network share:
1
sudo mount -t cifs //[samba share IP]/sambaShare -o credentials=/home/[username]/.smb /mnt/fileShare
- Browse the network share:
1
ls /mnt/fileShare - Configure the Pi to mount the share after every boot:
1
sudo nano /etc/fstab - Add this to the end, save, and exit:
1
//[samba share IP]/sambaShare   /mnt/fileshare  cifs    credentials=/home/[username]/.smb,noauto,x-systemd.automount    0   0
- Restart the system daemon, and authenticate if necessary:
1
sudo systemctl daemon-reload - Reboot the Pi and verify you can still browse the network share.
- Run slideshow:
1
feh --fullscreen --slideshow-delay [seconds] --randomize --hide-pointer /mnt/fileshare/[path]/[to]/[photos]/*
Digital Picture Frame
So far, you only have a Raspberry Pi capable of starting an ad-hoc slideshow. If we want this to start the slideshow at boot up for a true digital frame experience, there are a few more steps to perform.
- Create a bash script that starts the slideshow:
1
nano ~/start-slideshow.sh
- Add this, save, and exit:
1
2
3
#!/bin/bash
export DISPLAY=:0
feh --fullscreen --slideshow-delay [seconds] --randomize --hide-pointer [path to photos]/*
- Make the script executable:
1
sudo chmod +x ~/start-slideshow.sh - Test the script:
1
~/start-slideshow.sh
Press
CTRL + Cto end the slideshow. - Configure the script to run at startup (do NOT run this with
sudo):1
nano ~/.bashrc
- Add this to the bottom, save, and exit:
1
~/start-slideshow.sh
- Reboot. If the Pi is configured to log in automatically on boot, when it comes back up it should start the slideshow automatically. Neat!
Managing the Slideshow
Since the slideshow hijacks your session whenever you login, you’ll need to kill it if you want to do anything else on the Pi. When you connect using SSH, the slideshow script executes automatically but in a terminal you don’t see anything. Just press CTRL + C. If you connect via VNC, or log into the actual desktop, just press ESC on the slideshow. Then reboot when you’re finished with your session to start it again.
Flair
This “proof of concept” fit in so well that it became a permanent member of the PimpLab©. In addition to the Kurzegesagt slideshow, this Pi also serves as the manager node in some Docker swarm testing I’ve been doing. I’m also testing different backup ideas I’ve had (hence, the USB drive).
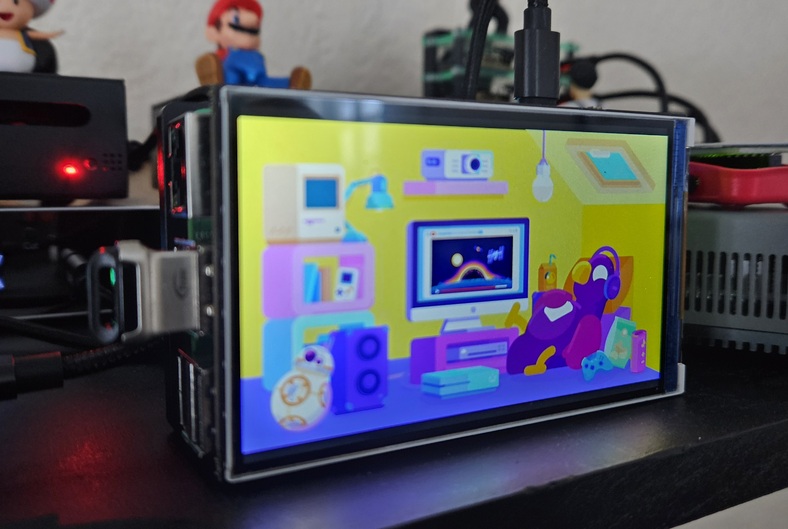
Here is my final result, a server masquerading as a digital picture frame. Just think about what this would look like on your own desk!