Building a quick-ish blog site with Jekyll
For some reason I wanted to try my hand at web-hosting. I started with Wordpress because honestly I didn’t know what else there was - I was completely new to web-hosting. I got really good at installing the LAMP stack and Wordpress, downloading the Minimalistix theme, stripping away most of the stuff on the front page of the theme to just the bare minimum, but any attempt to add something ended in frustration. The picture I managed to post wouldn’t even render correctly on mobile devices. The whole platform was confusing to me and at the end of the day, I really couldn’t be bothered to learn a whole new thing. I just wanted to put some damn content on the internet, not spend all my time trying to figure out how to design a web page. But I still wanted to maintain control of the site and the data by keeping it in house. My house.
Well I must not be too high maintenance because there are several solutions that work for this, like Jekyll. I use it to generate the site content here and some other sites. I chose it for two reasons:
- You create content in markdown, the language I know and understand and that is also friendly to humans.
- There is a whole community of theme developers that relieve me of all my web-design woes, leaving me to create content using basic templates. Jekyll does the magic to convert it to a webpage in the style of the theme you picked.
You don’t even need to mess with themes if you don’t want to. If you follow the quick start on the Jekyll landing page, it automatically downloads the minima theme and you don’t even have to think about it. Jekyll does even cooler things like publish your site to Github pages. I’m not getting into all that since I prefer to do my own hosting but there, that’s a thing you know now.
Anyways that’s it. That’s the pitch. Here’s how to set up a basic site using a theme from the Ruby Gems gallery.
High level steps:
- Install dependencies
- Install Jekyll
- Pick a theme and clone it
- Prepare the theme bundle
- Make some edits, do some testing
- Build the site
Install dependencies
According to the Jekyll documentation for ‘other Linux’ (I do my development and testing on an Orange Pi Zero 2 W with DietPi OS), you only need to install ruby-full and build-essential. However, when you move on to the Ubuntu Jekyll install directions it says you also need to install zlib1g-dev. When I started testing different themes I usually received a warning that I was missing zlib1g-dev so I just started installing it by default. Also install git so you can clone the themes.
1
sudo apt-get install ruby-full build-essential zlib1g-dev git -y
Since I installed and use Jekyll on a server with no desktop interface, I need a way to view the site hosted on localhost:4000. I solve this by connecting to the server using Visual Studio Code with the Remote-SSH extension. This setup forwards the Jekyll traffic running locally on the remote server, to your local machine and opens the site in your browser. When you save changes to site content simply update your browser to see them - it’s so f’n simple. Anyways, if you’re installing VS code do it now.
Install Jekyll
For my environment:
1
2
3
4
5
echo '# Install Ruby Gems to ~/gems' >> ~/.bashrc
echo 'export GEM_HOME="$HOME/gems"' >> ~/.bashrc
echo 'export PATH="$HOME/gems/bin:$PATH"' >> ~/.bashrc
source ~/.bashrc
gem install bundler jekyll
Pick a theme and clone it
There’s, like, so many themes. The Jekyll resources page has links to several theme libraries, and additional themes are available at the Ruby Gems page. Note that because there are hundreds of Ruby Gems, and not all of them are Jekyll themes, you will want to add some other keywords like ‘Jekyll theme’ to your searches. Or just enter ‘jekyll-theme-‘ which is a common naming format. In my example, I’m using the Slate theme. Here is an example of the same site hosted in Github Pages.
Create a git dir in your home directory:
1
2
mkdir ~/git
cd ~/git
Clone the theme:
1
2
git clone https://github.com/pages-themes/slate.git
cd slate
Prepare the theme
You have to install some of the theme dependencies, which are usually other Ruby Gems. The first thing I do with a new theme is run this command to install all the things:
1
bundle install
Make some edits, do some testing
At this point, you can start serving the site to see what it looks like:
1
bundle exec jekyll serve
If using VS Code to connect to your host server via Remote-SSH, a pop-up will ask if you want to open the site in your browser. Yes!
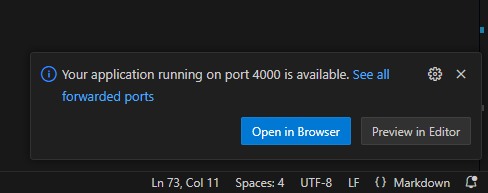
The site opens in your local browser and if you haven’t made any changes, it should be the same as the theme’s demo page. You basically just deployed a static website. You see where this is headed right? Let’s test some changes.
No matter what theme you go with, the first file you should edit is _config.yml. This file holds the basic information about your site. It will look different for every theme so refer to your theme’s documentation for detailed information but many themes have helpful comments included in the config. For example, here are some lines from the config file for this site:
1
2
3
4
5
6
7
title: thepimpest.com # the main title
tagline: My own uninteresting corner of the internet # it will display as the subtitle
description:
# Fill in the protocol & hostname for your site.
url: "https://thepimpest.com"
github:
  username: mrspo # change to your GitHub username
The Slate theme is a single page theme, written entirely to index.md - everything you put here is your website. So replace everything here with whatever you want - this is your site! If this is your first time editing markdown, maybe take a minute to check out the syntax. Compare the raw markdown with how it presents in the site. The Slate sample site even shows you what different formatting looks like. It’s not terrible to learn but there are plenty of cheat sheets online. In VS Code, if you enter keyboard shortcut CTRL + SHIFT + V it will open the file in preview mode so you can see your formatting at a quick glance.
Anyways, make any kind of change you want to index.md and save. If Jekyll is still serving the site, hitting save will update the site automatically so refresh your local browser and you will see the changes.
Build the site
Once the site is what you want it to be, you can build it. Jekyll will collect the entire repo contents, do the magic thing and convert everything to a functional HTML site:
1
bundle exec jekyll build
The magic, so to speak, is exported to the _site directory - everything that is the static site you just created is in that folder. You can now copy and paste those contents into your web server homepage directory and voila! a portable website! I seriously love it.
More advanced themes
If a single-page theme works for you then you’re finished - go crazy. There are tons of single-page themes like this. But maybe your blog site needs more than a single static page, like a sidebar or menu, an About section, or blogs. Well, go shop around for a theme that strikes your fancy. There are options o’plenty. In fact, some of you may have already noticed this site is built on the Chirpy theme. Once you get the hang of the layouts and functionality of Jekyll, you’re encouraged rather than discouraged to create content. Which is, after all, the point of this whole stupid endeavor.
Each theme will have different features so it’s hard to cover every possible scenario but there are a few general guidelines:
- Usually the
_config.ymlhas a lot more options to configure - RTFM - If your theme has a posting feature, a lot of times new posts will go in the
_postsdirectory, named in formatYYYY-MM-DD-blog-post-title.md. And files in the_postsdirectory are automatically formatted in thepost.htmllayout - At the top of your posts, you need a header that tells Jekyll what layout the post should take (available layouts are in the
_layoutsdir if one exists for your theme). The header for this post looks like this:1 2 3 4 5 6
--- title: Building a Quick-ish Blog Site With Jekyll date: 2025-02-22 14:00:00 categories: [Tech] tags: [thepimpest,self-hosting,code,mini-computing] ---
- For the most part, you leave the rest of the files in the theme alone. But if you don’t want all the bells and whistles (like removing social media functionality from my site because I have none), you will have to edit other files in the repo to remove it. Of course if you don’t know what you’re doing you’re liable to break things - luckily Jekyll will tell you exactly what it doesn’t like. I did a lot of trial and error here, and I think there are still some broken things on my site as of the time of this writing lol. I openly admit this site is a constant work in progress so it’s whatever.
- These themes have more stuff, so naturally it’s more likely to break. As mentioned earlier, Jekyll gives useful error messages so if you broke something in an edit, it’ll shout and you can just undo it. But if you get an error that something is missing or some other error, hopefully a web search will get you help. As with all things, the more you break it, the more you learn. Godspeed.
By the way, Techno Tim has an amazing video on getting started with Jekyll and the Chirpy theme. It was basically the inspiration for this post, and what prompted me to explore Jekyll further. He goes into a lot further details and shows the additional steps for publishing your page straight to Github pages - stupid easy. Check it out.
Thanks for coming to my TED talk.